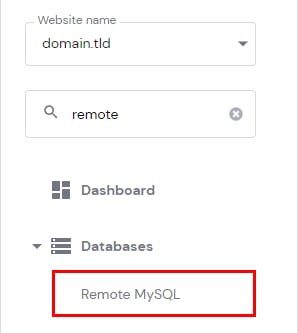
Hostinger control panel menu showing the highlighted Remote MySQL option under Databases
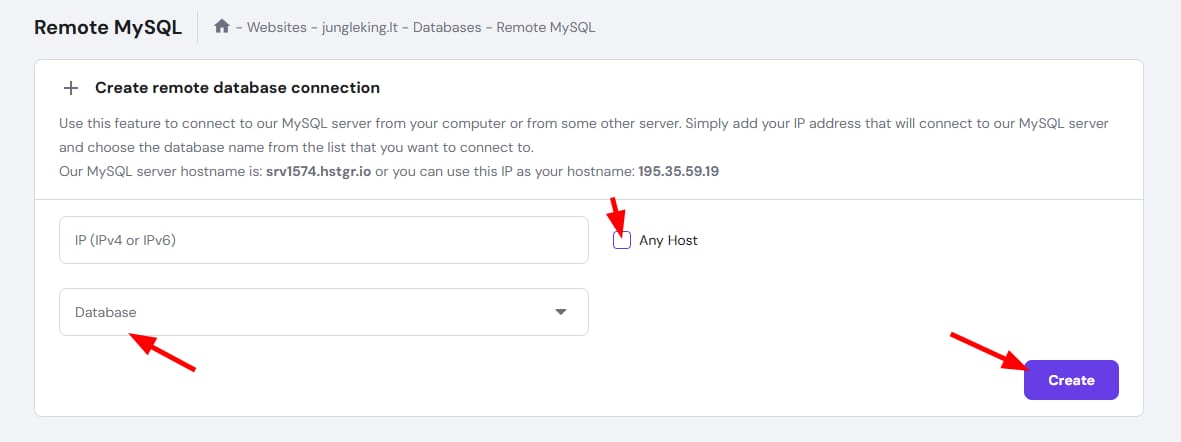
Hostinger Remote MySQL page showing Any Host checkbox, database dropdown, and Create button
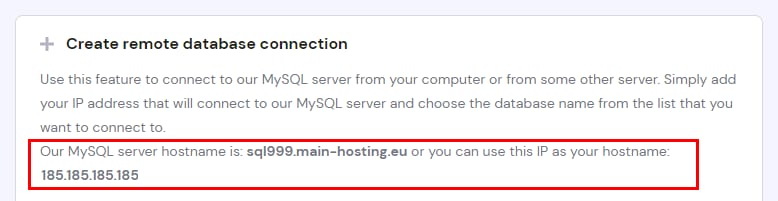
Hostinger MySQL setup showing server hostname and IP for remote database connection
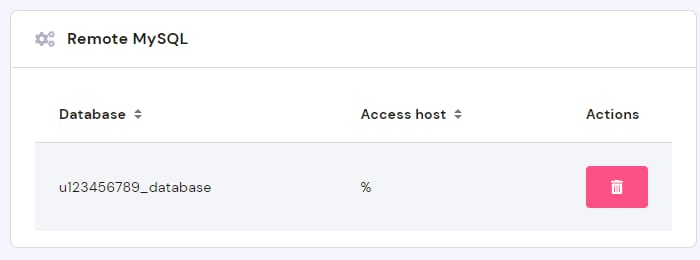
Hostinger Remote MySQL table showing database u123456789_database with access host % and delete action button

远程 MySQL 功能允许远程主机(服务器)管理你的数据库。要进行设置,首先需要允许所需的远程 IP 连接到你的数据库。方法是访问 Websites(网站)Dashboard(仪表盘),在左侧边栏中找到 Remote MySQL(远程 MySQL) 并点击:

在新打开的窗口中,填写相关信息即可创建新连接:

  • IP(IPv4 或 IPv6)——发起远程连接的 IP 地址

  • Any Host(任意主机)——勾选此复选框以允许来自任意 IP 的连接。这会在 IP 字段中添加 % 符号

  • Database(数据库)——选择将被远程访问的数据库

一切就绪后,点击 Create(创建)

你可以在 Create remote database connection(创建远程数据库连接) 部分顶部找到 MySQL 服务器主机名:

远程连接的默认端口为 3306 💡

创建远程访问后,你可以在 Remote MySQL(远程 MySQL) 部分根据需要将其移除:

就这么简单!现在你已经知道如何设置和管理数据库的远程访问 😊

来源:Hostinger 官方帮助文档