从 2026 年 1 月起,Gmail 将不再提供对 Web 浏览器上 POP3 连接和第三方邮件账户 Gmailify 的支持。通过 IMAP 的连接仍将可以通过手机应用(Android 和 iOS)实现。了解更多

理解 IMAP 连接与 Google Workspace 之间的区别很重要:

IMAP 连接: 你拥有 Hostinger Email(免费试用、Business Starter 或 Business Premium),并想在 Gmail 手机应用中读取/发送邮件。你的邮件仍托管在 Hostinger 的服务器上;Gmail 只是界面。

Google Workspace 套餐(G Suite): 你在 Hostinger 购买了 Google Workspace。Gmail 就是你的邮件服务——无需 IMAP 桥接。你直接使用自定义域名地址登录 Gmail。

不确定你拥有哪一种?请查看 hPanel → Emails

要在智能手机上设置 Gmail 中的 Hostinger Email,请确保:

  1. 你已在 Hostinger Email 创建邮件账户
  2. 你的域名已 指向 Hostinger
  3. 正确的 Hostinger Email MX 记录已添加 到域名的 DNS 区域

然后,按以下步骤操作 👇

👉 收集 Hostinger Email 账户详情

收集你的邮件账户的 配置详情

IMAP(入站) POP3(入站) SMTP(出站)
主机:imap.hostinger.com 主机:pop.hostinger.com 主机:smtp.hostinger.com
加密:SSL 加密:SSL 加密:SSL
端口:993 端口:995 端口:465

如果你不太确定邮件密码,可以轻松 重置它

👉 在安卓 Gmail 中设置 Hostinger Email

第 1 步 – 安装应用
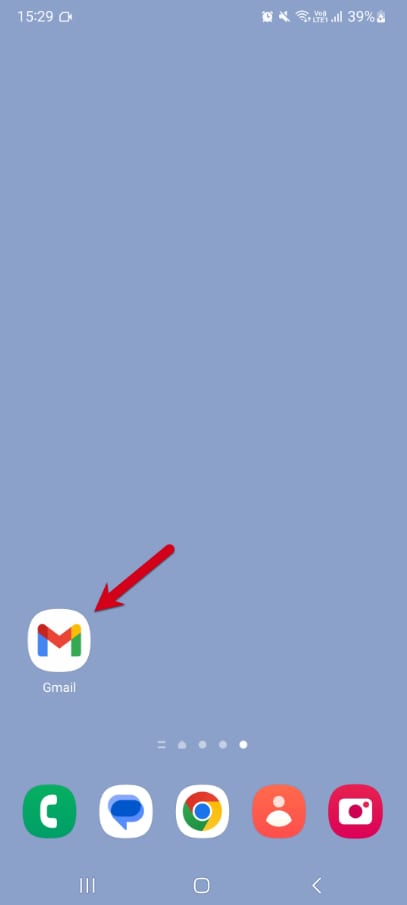
Android home screen with Gmail app icon highlighted by a red arrow

首先,确保你的设备上已安装 Gmail 应用。

安装后,在你的安卓设备上打开 Gmail 应用

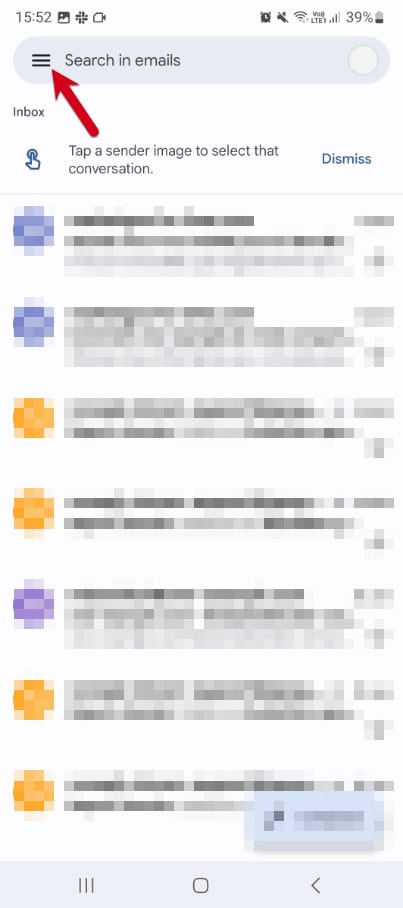
第 2 步 – 进入设置

Gmail inbox on Android with the hamburger menu highlighted near the search bar

点击左上角的菜单图标展开侧边栏。

滚动到底部并点击 Settings(设置)

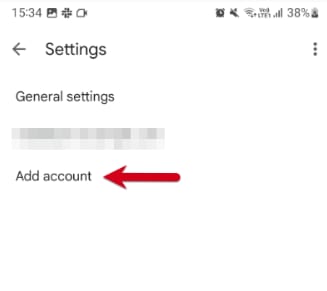
第 3 步 – 点击“Add account(添加账户)”

Gmail settings screen with Add account option highlighted

点击 Add account(添加账户) 开始邮件设置过程。

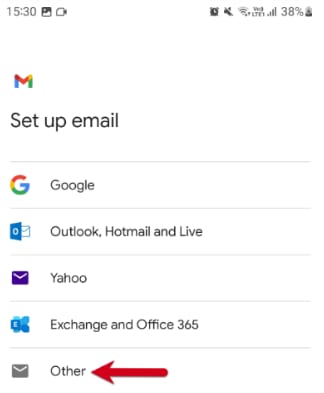
第 4 步 – 选择“Other(其他)”
Gmail setup screen showing the Other email account option highlighted at the bottom

选择 Other(其他) 作为你要设置的账户类型。

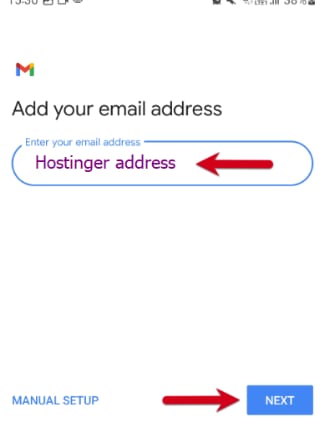
第 5 步 – 输入你的邮件地址
Gmail add email address screen with Hostinger address field highlighted and Next button below

输入你完整的 Hostinger 邮件地址(例如 yourname@yourdomain.com)。

点击 Next(下一步)

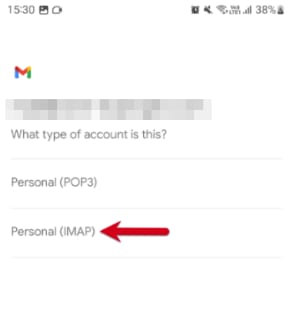
第 6 步 – 选择 IMAP

Gmail account type selection screen with Personal (IMAP) option highlighted

当询问账户类型时,选择 IMAP

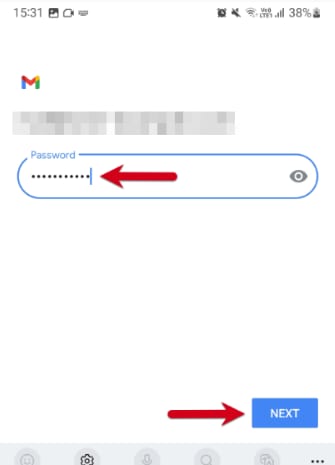
第 7 步 – 输入你的邮件密码

Gmail password field with Next button highlighted for email setup

输入你登录 Hostinger Webmail 使用的密码。

点击 Next(下一步)

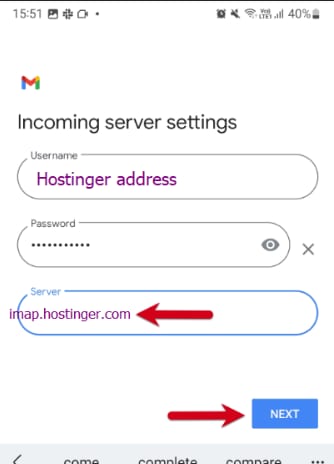
第 8 步 – 配置入站服务器

Gmail incoming server settings with imap.hostinger.com highlighted and Next button below

将入站邮件服务器设置为:

imap.hostinger.com

点击 Next(下一步)

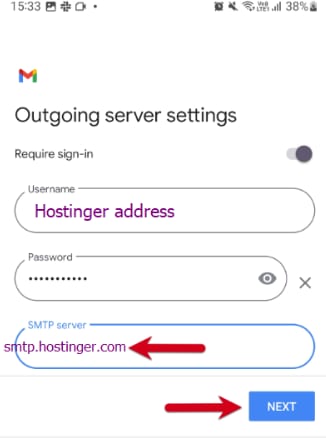
第 9 步 – 配置出站服务器

Gmail outgoing server settings with smtp.hostinger.com field and Next button highlighted

将出站邮件服务器设置为:

smtp.hostinger.com

点击 Next(下一步)

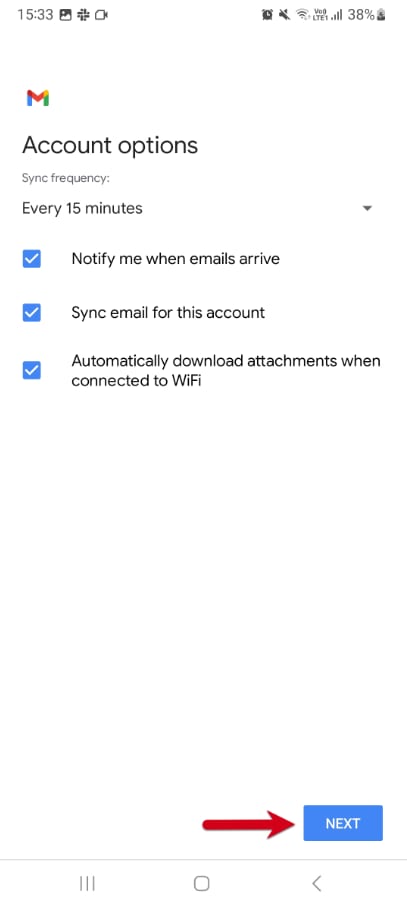
第 10 步 – 选择账户选项

调整 Gmail 检查新邮件的频率、是否需要通知以及其他同步设置。取消勾选你不需要的选项,然后点击 Next(下一步)

第 11 步 – 完成设置

Gmail account options screen with the Next button highlighted at the bottom right

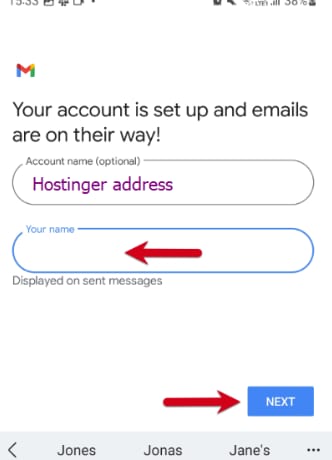
就是这样!你的 Hostinger 邮件账户现已添加并可在 Gmail 应用中使用,你可以选择为地址添加一个名称,然后点击 Next(下一步) 完成设置。

故障排查
Gmail setup screen for Hostinger email with the Next button highlighted

大多数错误与在邮件客户端中输入的参数不正确有关。在这种情况下,强烈建议重置密码并重新输入一次参数,确保 IMAP 或 POP3 与 SMTP 设置与上表一致。

来源:Hostinger 官方帮助文档