让你的 WordPress 或网站构建器(Website Builder)网站具备 AI 就绪能力,并可供新兴一代 AI 智能体访问。
Web2Agent 是 Hostinger 开发并运营的一项实验性功能。它将你的网站转变为一个完全兼容 AI 的智能体,可被 AI 工具轻松发现、理解并访问。目前它与 Claude、Cursor 以及支持 MCP 协议的工具配合最佳,我们正在努力将其与 ChatGPT、Gemini 及其他自主 AI 智能体集成。
随着互联网向智能体驱动的未来转变,该功能有助于将你的网站定位为该生态系统中一流的参与者——智能、可访问且可互操作。
为什么要加入?
通过启用 Web2Agent,Hostinger 将你的网站转变为 AI 就绪的智能体,使其他 AI 系统更容易访问、处理并与你的内容交互。对你网站的任何更新(例如新文章或结构变更)都会被自动跟踪并同步,确保 AI 工具始终使用最新版本。
这一过程是完全自动化的,在后台无缝进行,不会改变你网站的设计,也无需手动管理。随着 AI 成为用户探索网络的更常见方式,它还能让你的线上存在面向未来。
Web2Agent 在设计时考虑了隐私,尊重 robots.txt 和 llms.txt 等行业标准,让你保持完全的控制。参与完全是可选的,你可以随时关闭它,且不会影响你网站可见的内容。
如何加入?
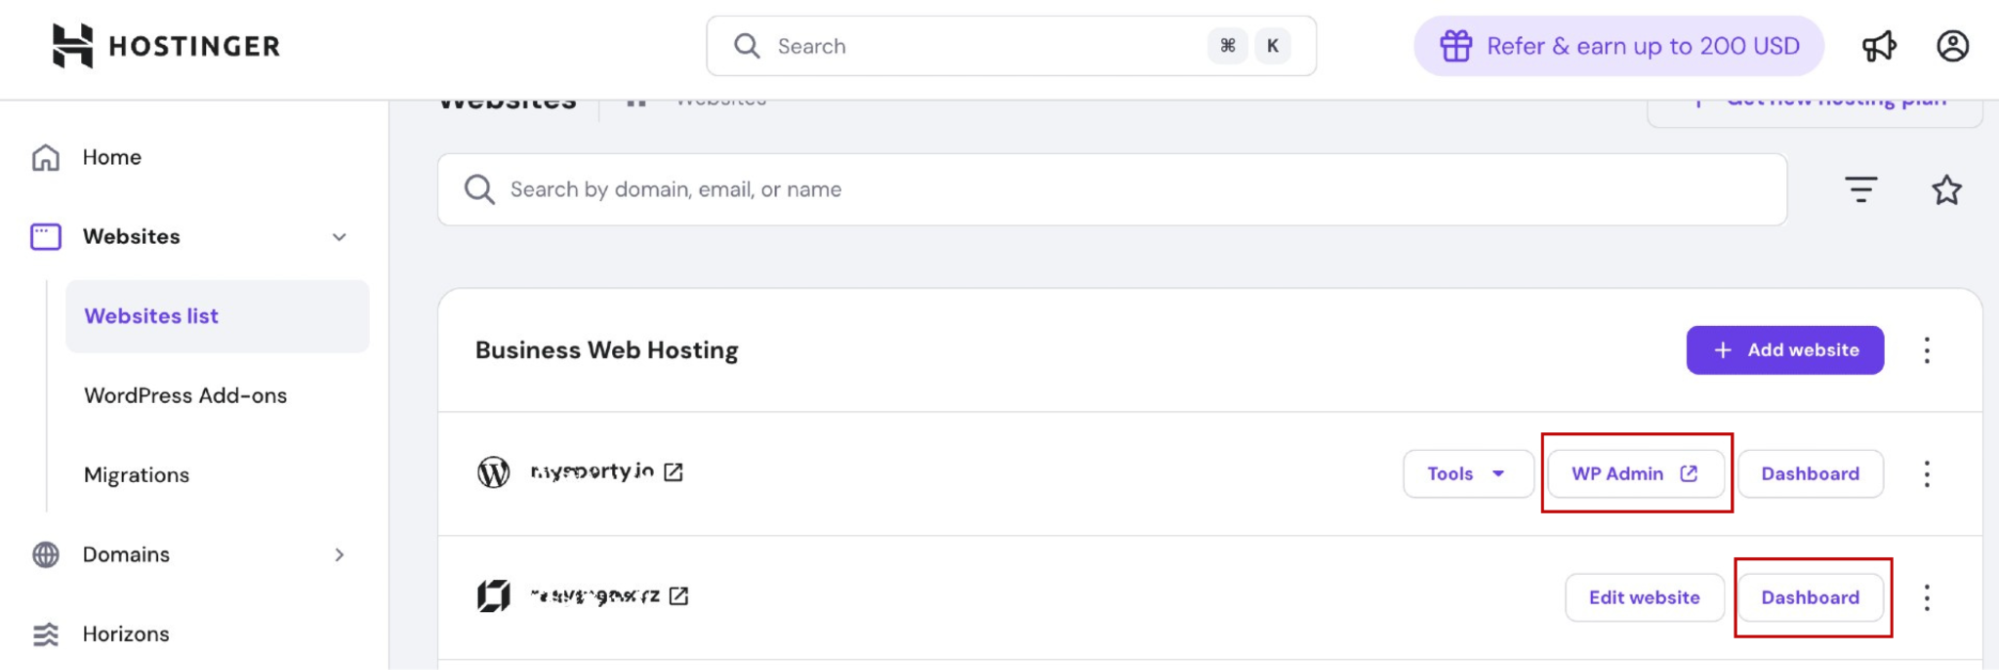
要加入,请从 网站(Websites) → 网站列表(Website list) 进入你的网站仪表盘。
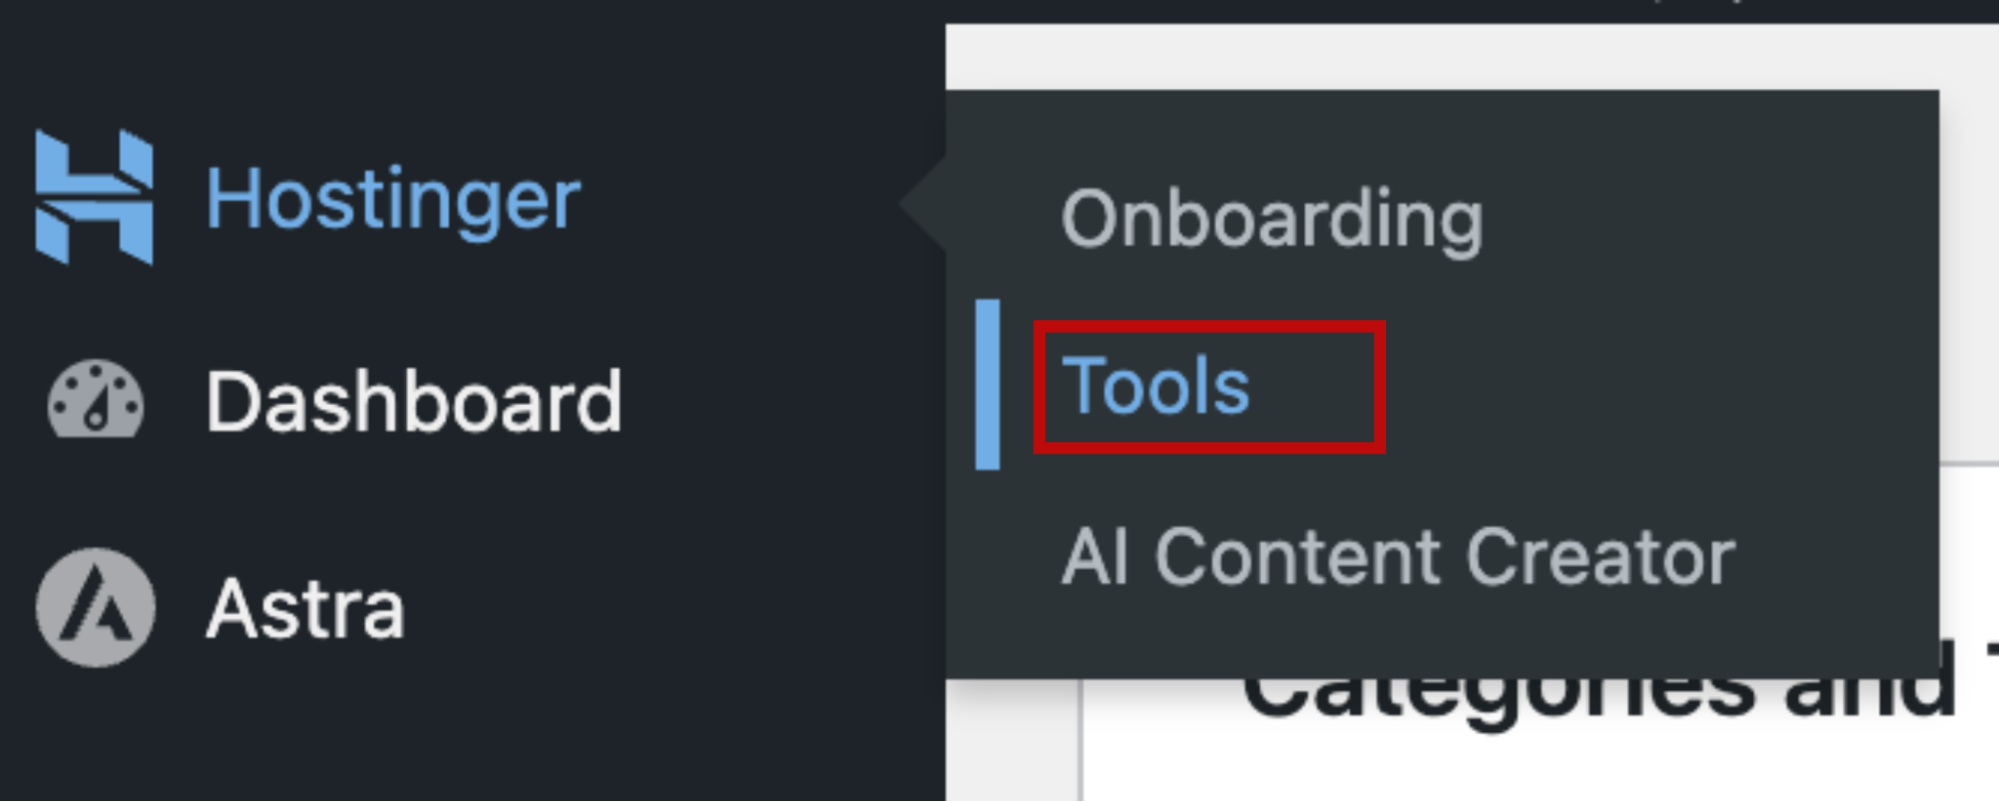
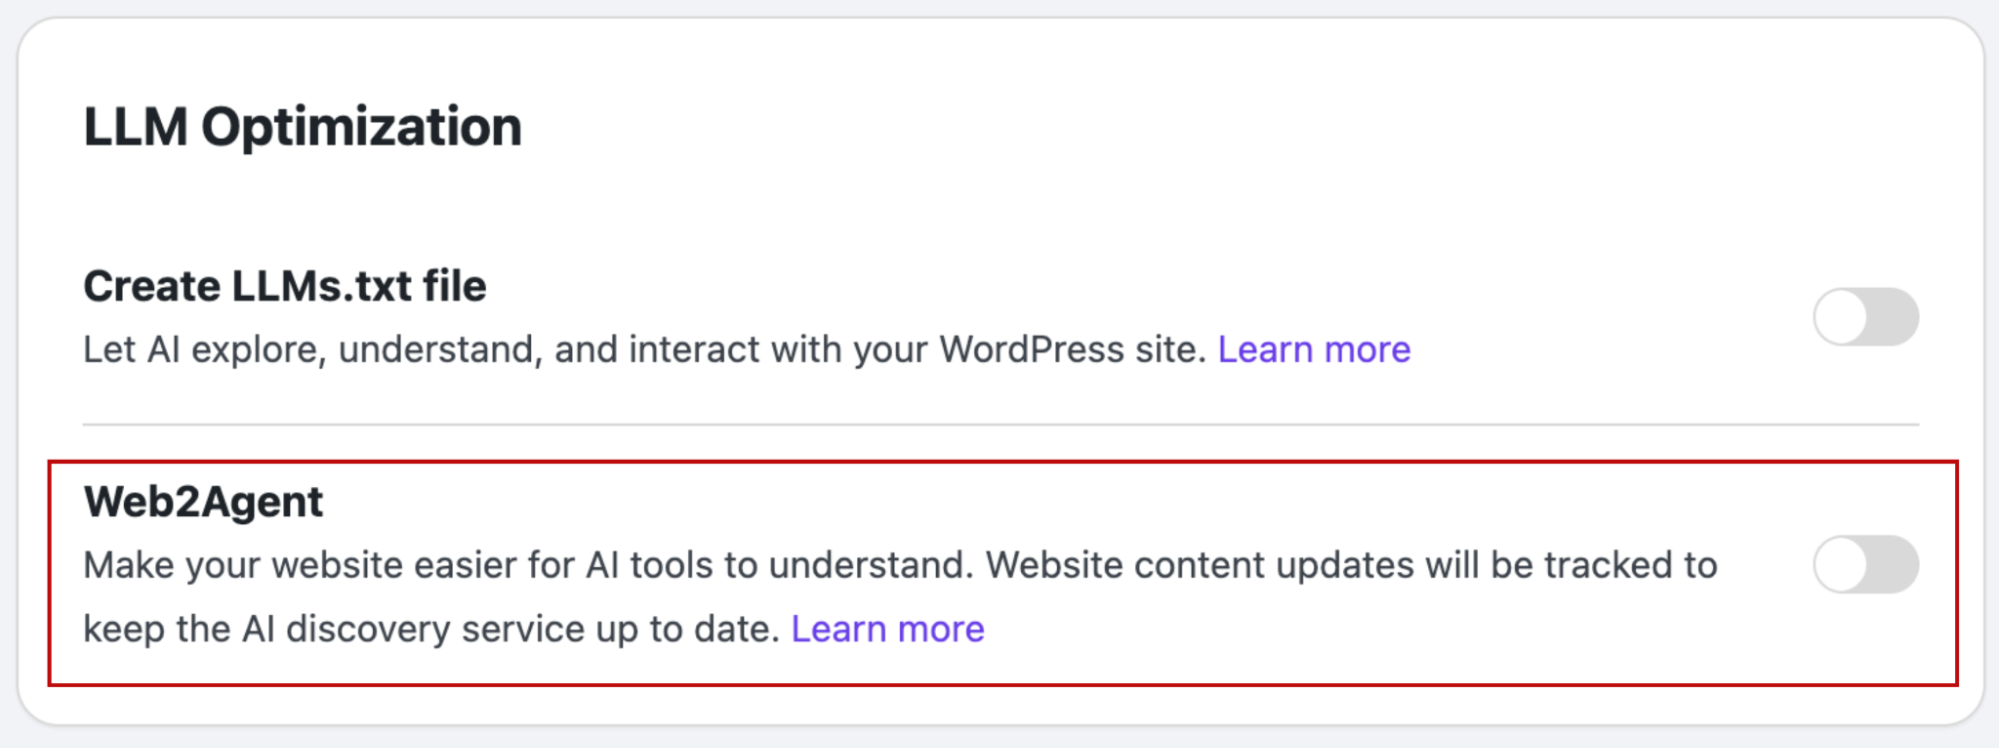
对于 WordPress,进入 WP Admin,导航到 Hostinger → 工具(Tools)。找到 LLM 优化(LLM Optimization) 部分,并启用 Web2Agent 功能。
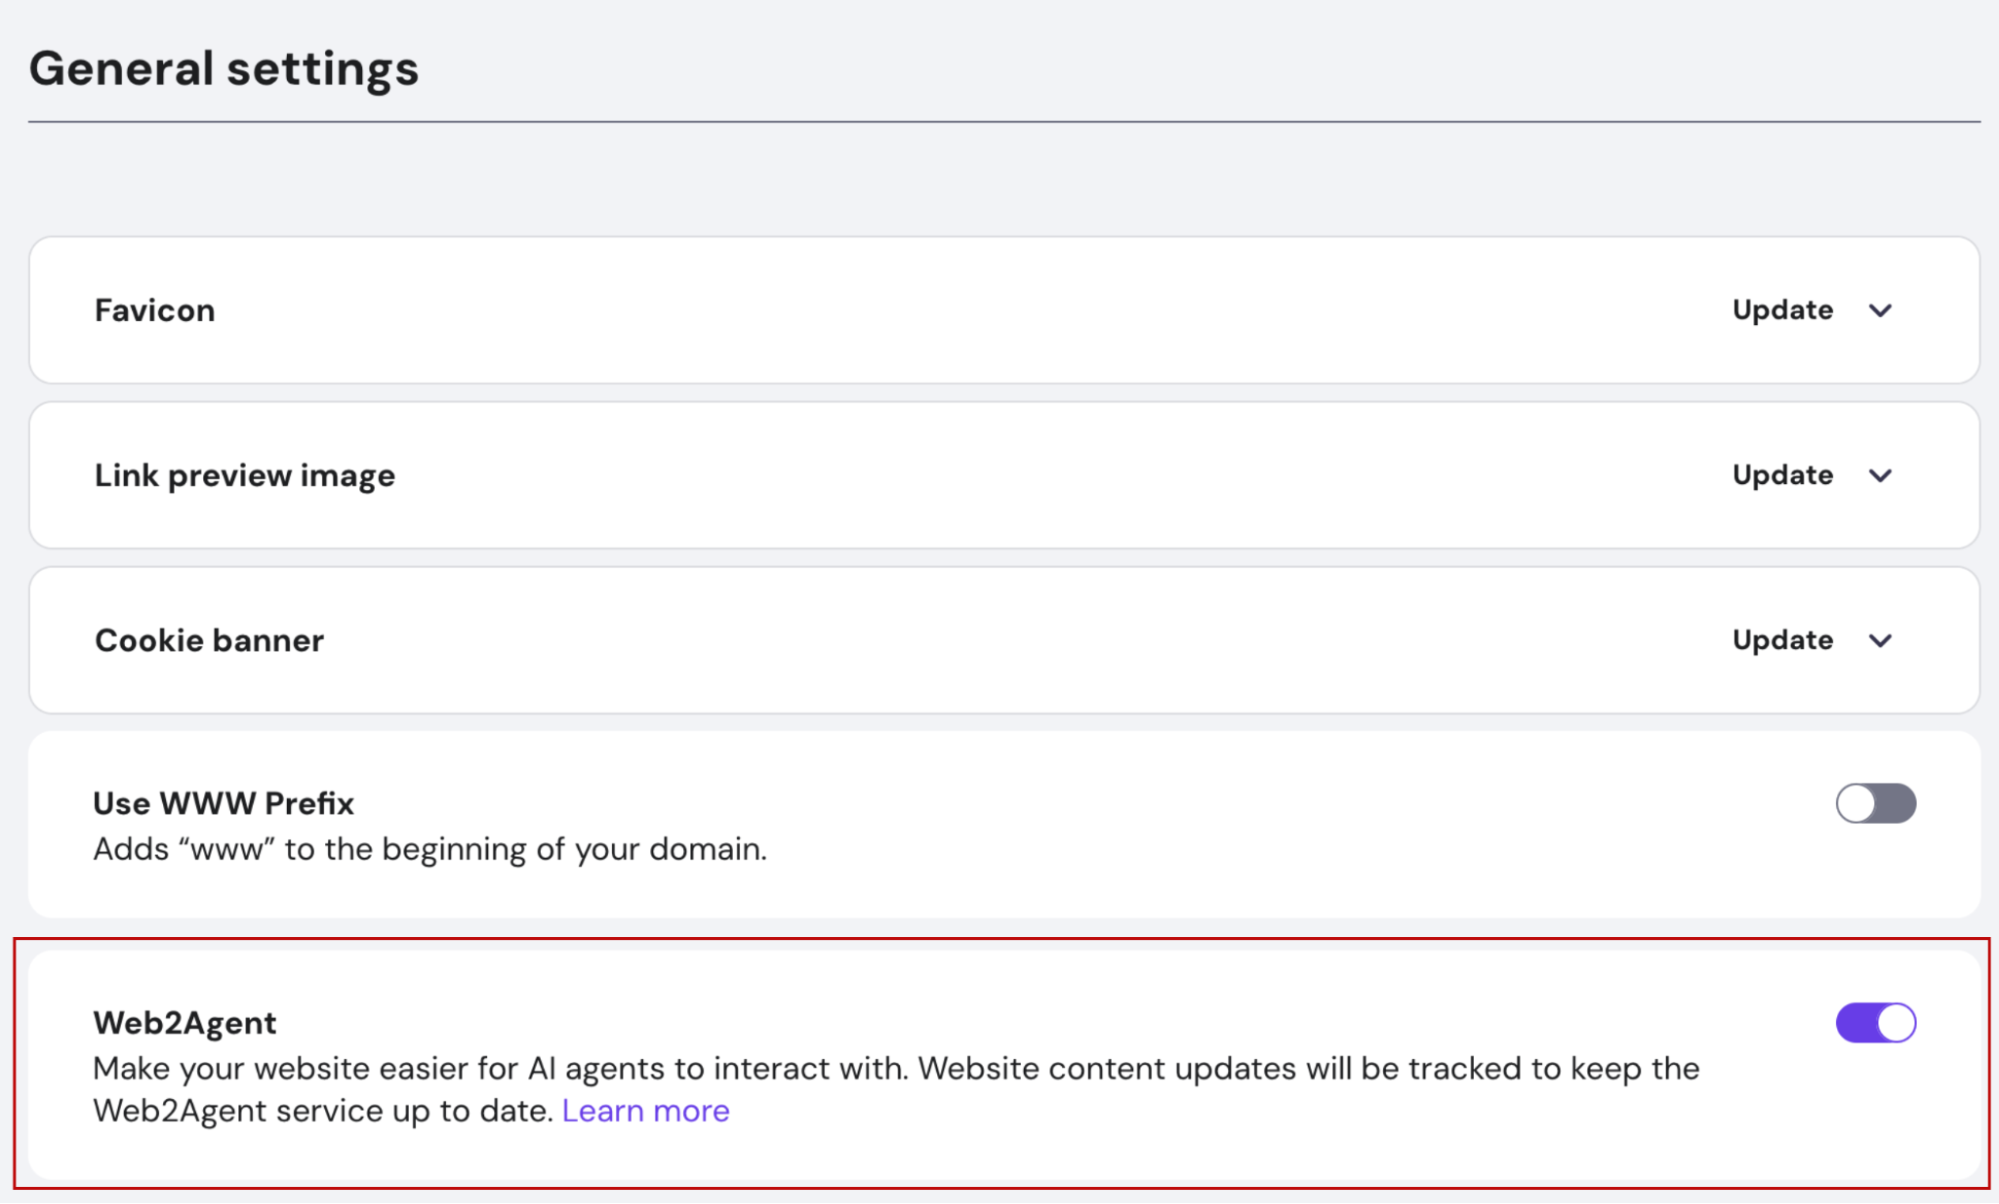
对于 Hostinger 网站构建器(Website Builder),过程类似。进入你网站的一般设置,并在那里启用 Web2Agent 功能。
与 AI 工具一起使用 Web2Agent
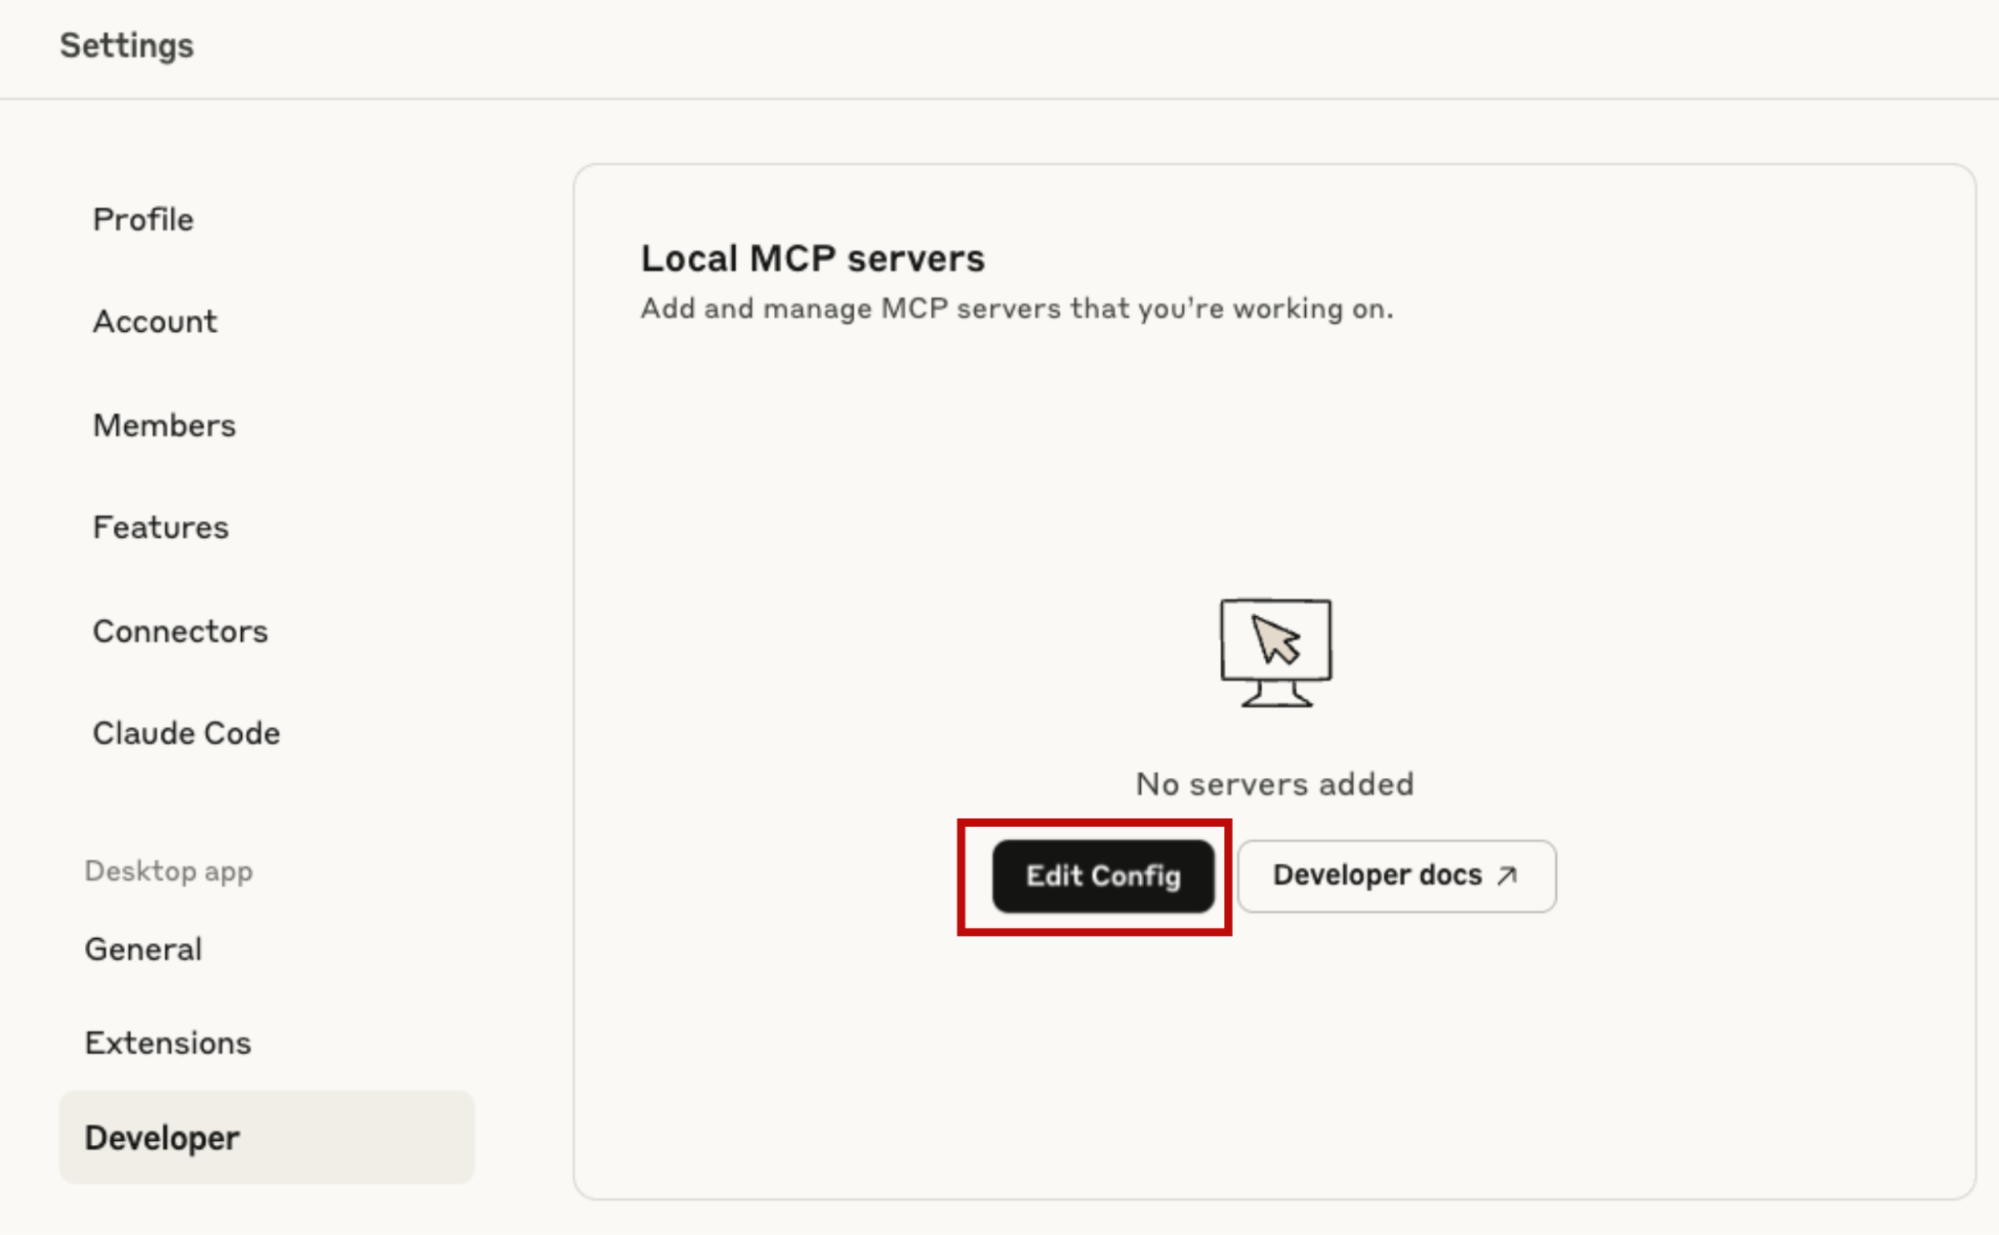
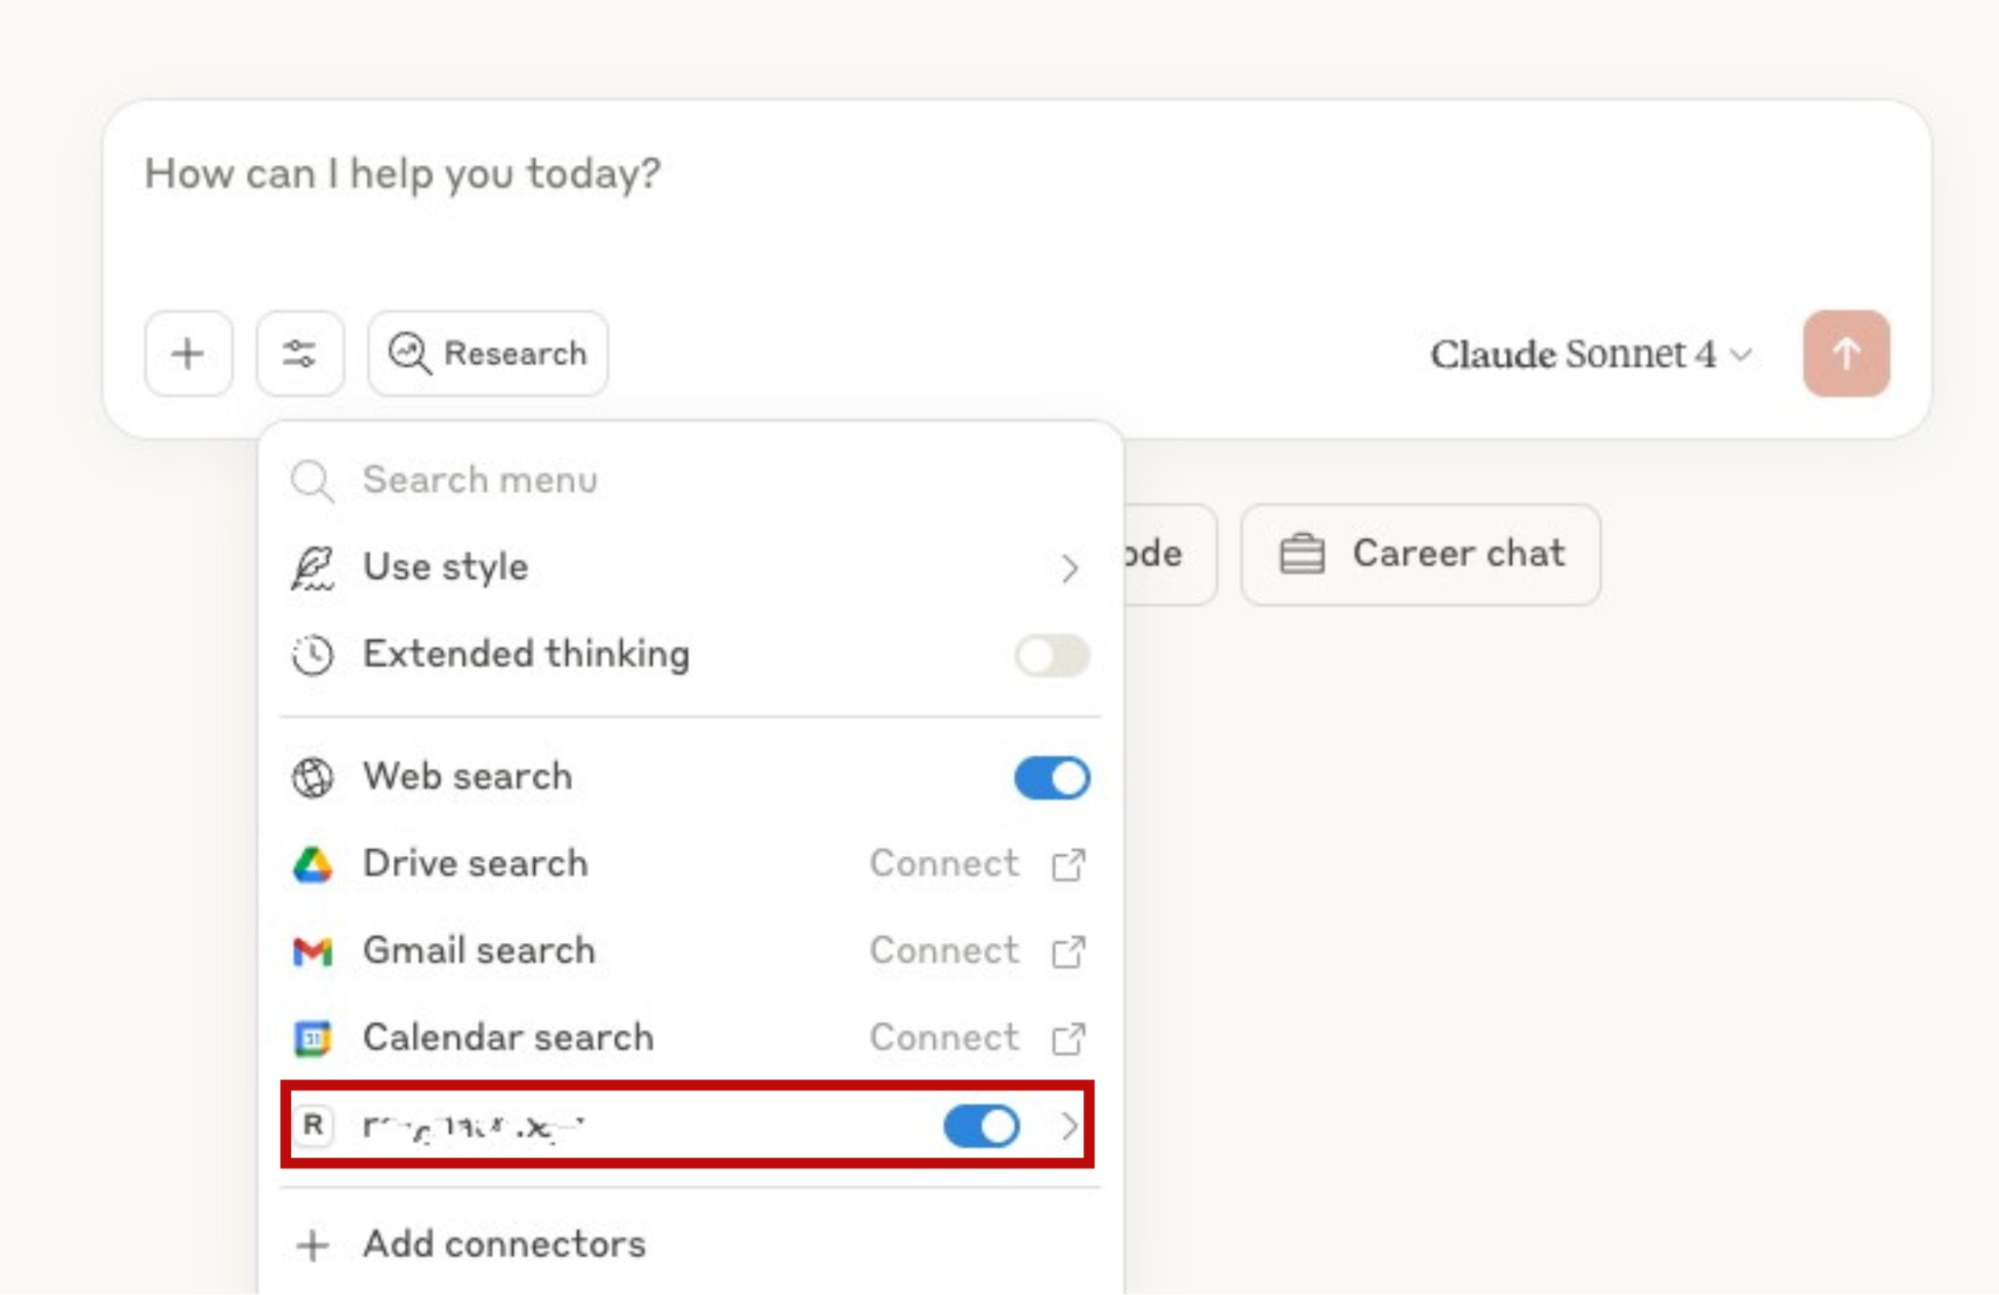
激活 Web2Agent 服务会启动对你网站的爬取以收集其上下文。此过程通常需要 2–15 分钟,具体取决于你网站的规模。爬取完成后,你的网站即可处理 AI 智能体请求。
测试该功能能力的一个好方法是将它与 Claude Desktop 等 AI 工具集成。首先,打开 Claude Desktop 设置并进入 Developer 部分。在那里,你会找到 Edit Config 选项,它将打开 claude_desktop_config.json 文件。你需要编辑此文件,将你的 Web2Agent 网站智能体添加到 Claude Desktop。
将以下行添加到文件中,将 {YOUR DOMAIN} 占位符替换为你的实际域名。例如,如果你的域名是 mywebsite.com,则将 {YOUR DOMAIN} 替换为 mywebsite.com。
{
"mcpServers": {
"{YOUR DOMAIN}": {
"command": "npx",
"args": [
"mcp-remote",
"https://websites-agents.hostinger.com/{YOUR DOMAIN}/mcp/"
]
}
}
}
以 mywebsite.com 域名为例,设置文件应如下所示:
{
"mcpServers": {
"mywebsite.com": {
"command": "npx",
"args": [
"mcp-remote",
"https://websites-agents.hostinger.com/mywebsite.com/mcp/"
]
}
}
}
添加后,你应该能在工具列表中看到你的网站。如果它被禁用,请启用它。
Web2Agent 功能允许你将对 MCP 协议支持的不同工具(就像我们对 Claude Desktop 所做的那样)集成你的网站内容。你也可以使用任何编程语言创建使用你自己网站内容的自定义应用。
透明度与数据处理
当你加入时,Hostinger 仅安全共享相关的网站更新事件,例如内容发布时或你网站结构变更时。这些数据会发送到 Hostinger 的 Web2Agent 服务。这些数据仅用于维护你网站最新的 AI 呈现,并增强其对基于智能体的工具的可访问性。
不跟踪任何访客活动,也不收集任何个人用户数据。该功能遵循 WordPress 和 Website Builder 的必要集成标准,包括在传输任何数据前获得你的同意。
来源:Hostinger 官方帮助文档