DKIM(DomainKeys Identified Mail,域名密钥识别邮件)记录是特定的 DNS 记录,可保护你的域名免受仿冒和钓鱼尝试。它验证所有外发邮件确实由你发出。
使用 DKIM 还能防止你的邮件被标记为垃圾。
设置自定义 DKIM 记录
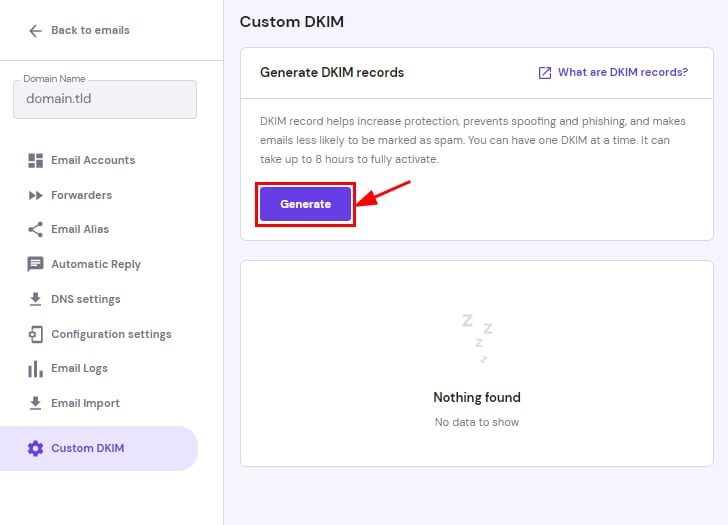
要为 Hostinger Email 创建自定义 DKIM 记录:
1. 进入 Emails 区块,点击相关邮件服务旁边的 Manage(管理)。
2. 进入 Custom DKIM(自定义 DKIM) 区块,点击 Generate(生成):
如果 Generate(生成) 按钮是灰色的,你必须删除 DNS 区域中任何现有的 DKIM 记录才能使用此功能 💡
3. 最后,使用生成的值在你的域名 DNS 区域 创建一条新的 TXT 记录。
完成这些更改后,请给它们 最多 24 小时 在全球范围内 传播 💡
验证自定义 DKIM 记录
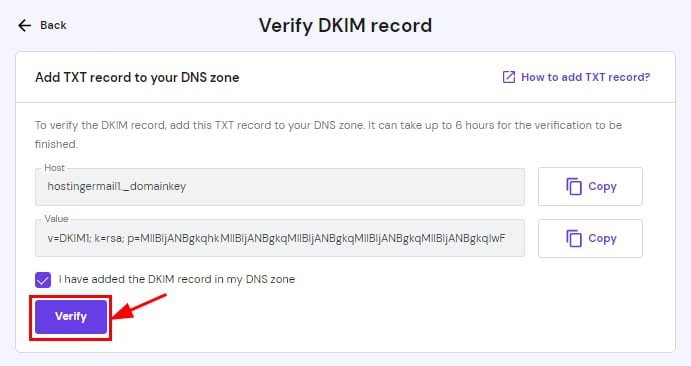
一旦 DNS 传播 完成,你可以验证 DKIM 记录是否正确添加。
在邮件管理面板中,进入 Custom DKIM(自定义 DKIM) 区块,勾选“I have added the DKIM record to my DNS zone(我已将 DKIM 记录添加到 DNS 区域)”,然后点击 Verify(验证):
管理自定义 DKIM 记录
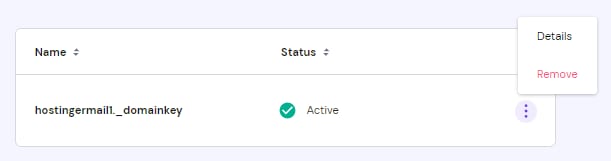
一旦验证自定义 DKIM 记录已成功添加到域名 DNS 区域,你就可以查看记录的详情,并找到移除它的选项:
如果你移除了自定义 DKIM,你的邮件会恢复使用 默认 DKIM 记录。
自定义和默认 DKIM 记录可以同时启用——它们不会冲突 💡
现在你知道如何为 Hostinger Email 创建和管理自定义 DKIM 记录了!
来源:Hostinger 官方帮助文档