要自动设置 Mozilla Thunderbird 上的 Hostinger Email,请遵循 这篇文章。
要手动设置 Mozilla Thunderbird 上的 Hostinger Email,请确保:
- 你已在 Hostinger Email 创建邮件账户
- 你的域名已 指向 Hostinger
- 正确的 Hostinger Email MX 记录已添加 到域名的 DNS 区域
然后,按以下步骤操作 👇
收集 Hostinger Email 账户详情
收集你的邮件账户的 配置详情:
| IMAP(入站) | POP3(入站) | SMTP(出站) |
|---|---|---|
| 主机:imap.hostinger.com | 主机:pop.hostinger.com | 主机:smtp.hostinger.com |
| 加密:SSL | 加密:SSL | 加密:SSL |
| 端口:993 | 端口:995 | 端口:465 |
如果你不太确定邮件密码,可以轻松 重置它。
在 Mozilla Thunderbird 上设置 Hostinger Email
首先,确保你的设备上已安装 Mozilla Thunderbird 应用。
选项 1 – 自动设置(推荐)
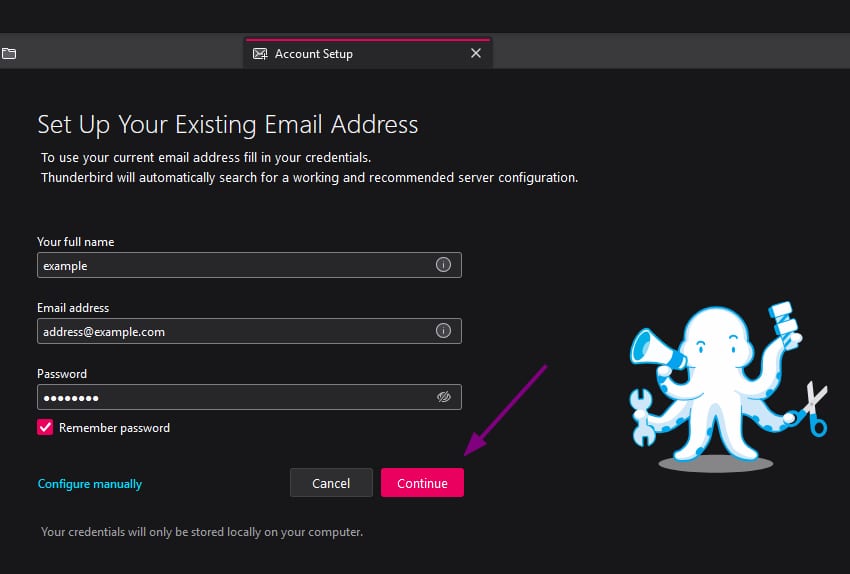
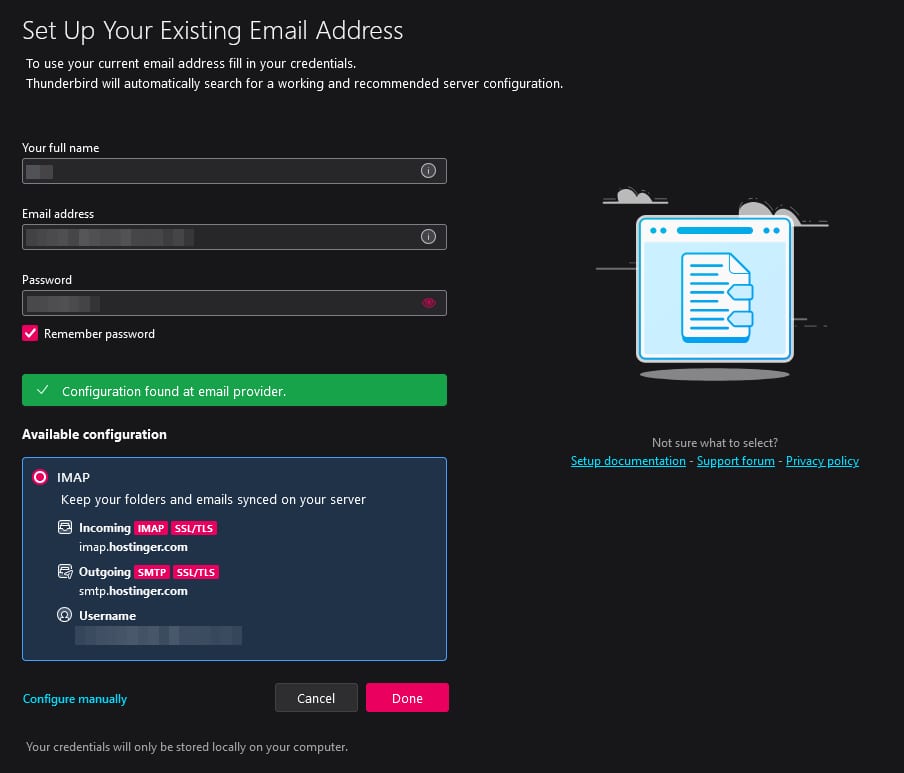
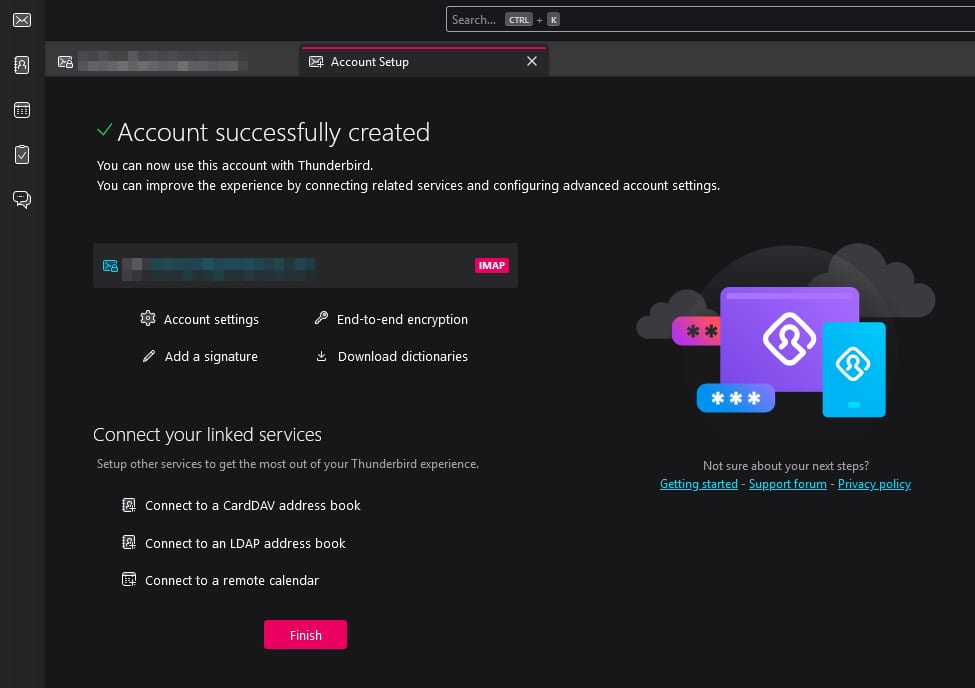
在大多数情况下,Thunderbird 可以自动检测 Hostinger 邮件设置。如果由于某种原因无法工作,请转到选项 2。
分步:
- 打开 Thunderbird。
- 进入 Account Settings > Account Actions > Add Mail Account(账户设置 > 账户操作 > 添加邮件账户)。
- 填写:
- Your name(你的名称)(将显示在发出的邮件中)
- Email address(邮件地址)(例如 example@yourdomain.com)
- Password(密码)(邮件密码) - 点击 Continue(继续)。
Thunderbird 会尝试自动配置你的账户。如果成功:
- 点击 Done(完成),然后 Finish(结束)。
选项 2 – 手动设置
如果自动配置失败,或你更喜欢手动输入设置,请按以下步骤操作:
分步:
第 1 步 – 添加新的邮件账户
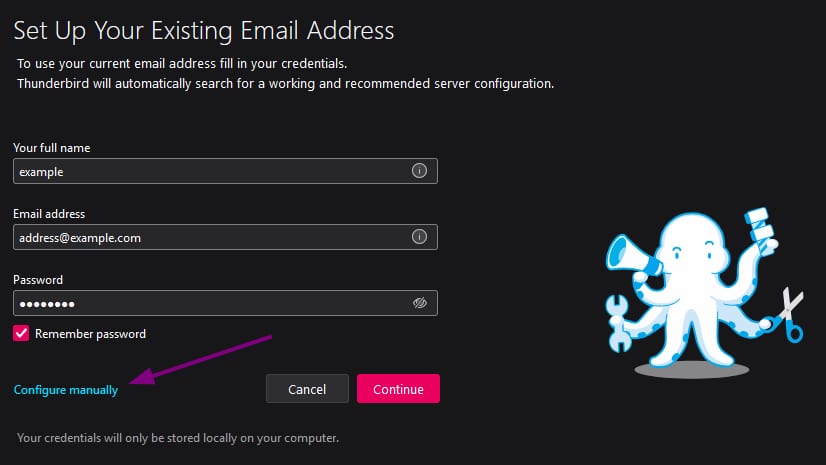
- 打开 Thunderbird。
- 进入 Account Settings > Account Actions > Add Mail Account(账户设置 > 账户操作 > 添加邮件账户)。
- 输入你的名称、邮件地址和密码。
- 点击 Configure manually(手动配置)。
第 2 步 – 输入服务器设置
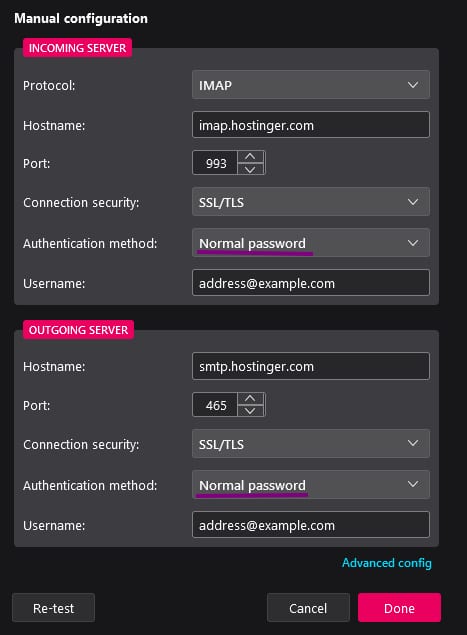
选择 IMAP(推荐) 或 POP3。
👉 IMAP(推荐):
- Incoming server(入站服务器):imap.hostinger.com
- Port(端口):993
- SSL:SSL/TLS
- Authentication(认证):Normal password(普通密码)
- Outgoing server (SMTP)(出站服务器):smtp.hostinger.com
- Port(端口):465
- SSL:SSL/TLS
- Authentication(认证):Normal password(普通密码)
👉 POP3(替代):
- Incoming server(入站服务器):pop.hostinger.com
- Port(端口):995
- SSL:SSL/TLS
- Authentication(认证):Normal password(普通密码)
入站和出站服务器都使用你的完整邮件地址作为用户名。
第 3 步 – 完成设置

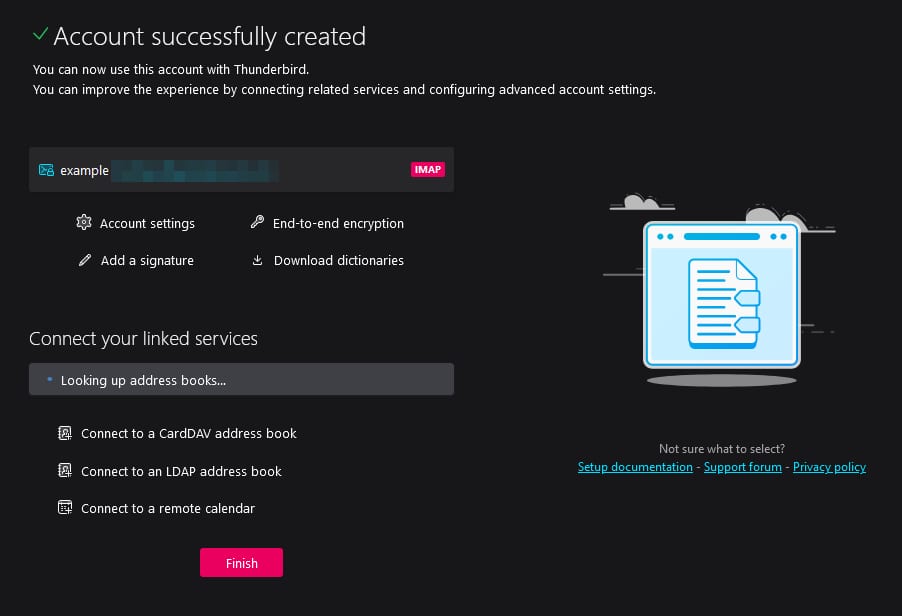
- 点击 Re-test(重新测试) 以验证配置。
- 一旦 Thunderbird 确认一切正确,点击 Done(完成),然后 Finish(结束)。
✅ 就是这样!
你的 Hostinger 邮件账户现在已准备好在 Thunderbird 中使用。你可以毫无问题地收发邮件。
故障排查
如果某些地方无法工作:
- 仔细检查服务器设置。
- 确保选择了 SSL/TLS。
- 确认邮件和密码正确。如果不确定,请尝试 如何重置 Hostinger Email 邮箱密码。
- 检查域名的 DNS(MX 和 SPF 记录)是否正确设置 Hostinger Email MX 记录。
来源:Hostinger 官方帮助文档