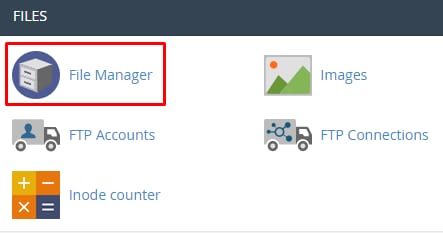
Hostinger cPanel File Manager icon highlighted in the Files section

关于 cPanel 文件管理器中基础操作的一切

你可以轻松找到文件管理器:打开 cPanelFiles 板块:

文件管理器栏按钮

Hostinger cPanel File Manager search scope dropdown with All Your Files selected
cPanel File Manager toolbar with the Home button highlighted

在此板块中,你可以在所选目录中搜索特定文件,也可以更改文件管理器的设置,例如选择打开文件管理器时默认打开的根目录、显示隐藏文件(dotfiles) 以及禁用字符编码验证对话框。

  1. Home – 返回为你的主机套餐指定的目录,其中包含你的所有其他文件夹和文件,例如 public_html。其路径为 /home/你的 cPanel 用户名
  2. Up One Level – 根据目录树,进入你当前所在文件夹的上一级文件夹。
  3. Back – 返回到你之前所在的目录。
  4. Forward – 返回到你刚刚离开的目录。
  5. Reload – 刷新你正在操作的目录(用于你在文件管理器打开时通过 FTP 上传/更改了文件,并希望看到更改时)。
  6. Select All – 选择目录中的所有文件。
  7. Unselect All – 取消选择目录中的所有文件。
  8. View Trash – 显示已删除文件的列表。
  9. Empty Trash – 删除回收站中的所有文件。

上下文菜单
cPanel File Manager toolbar with upload, download, move, copy, folder, file, and delete actions
cPanel File Manager toolbar with Rename, Edit, HTML Editor, Permissions, View, Extract and Compress actions
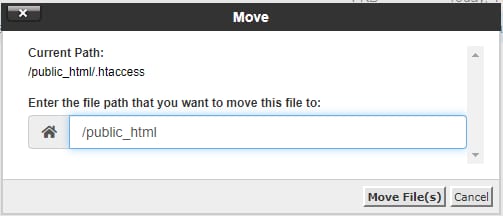
cPanel File Manager move dialog with destination path field set to /public_html
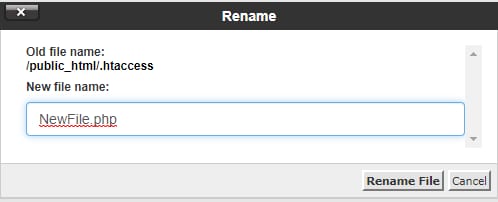
cPanel File Manager rename dialog with the new file name field selected and filled with NewFile.php
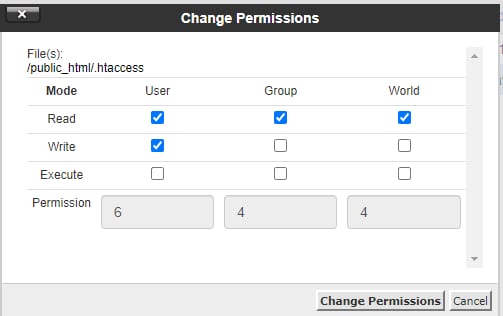
cPanel File Manager permissions dialog for .htaccess with user read and write checked
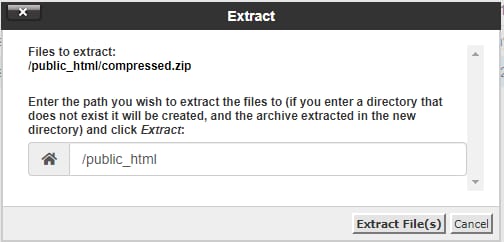
cPanel File Manager extract dialog with the /public_html folder path selected
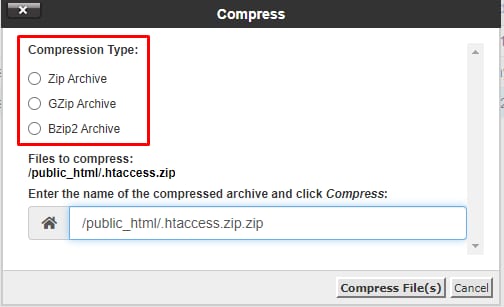
cPanel File Manager compress dialog showing compression type options for a file

上下文菜单 会在选中特定文件或目录时激活(右键点击也能看到相同的功能):

  1. File – 允许你在当前浏览的文件夹中创建文件。
  2. Folder – 让你可以创建新目录。
  3. Copy – 选择此选项可将文件或文件夹复制到相同或不同的位置。过程与 Move 设置类似。
  4. Move – 允许你将所选文件或文件夹转移到另一个目录。只需写下新目录的路径并点击 Move File(s):
  5. Upload – 打开一个弹出窗口,允许你选择要上传的新文件(最大 256 MB)。
  6. Download – 直接下载所选文件或归档(最大 256 MB)。
  7. Delete – 永久删除所选文件或文件夹。
  8. Restore – 从回收站中恢复文件或文件夹。
  9. Rename – 让你可以编辑文件或文件夹的名称:
  10. Edit – 选择此选项以编辑文本文件。
  11. HTML Editor – 在可视化 HTML 编辑器中打开 HTML 文件。
  12. Permissions – 通过读、写或执行文件及目录选项指定权限:
    文件的默认权限为 644,即:
    - 所有者 – 读、写
    - 组 – 读
    - 其他人 – 读
    文件夹的默认权限为 755,即:
    - 所有者 – 读、写、执行
    - 组 – 读、执行
    - 其他人 – 读、执行
  13. View – 在新窗口中查看文件内容。
  14. Extract – 仅在选择压缩文件时可见,让你可以将归档解压到所需位置:
  15. Compress – 顾名思义,让你可以将文件或文件夹压缩为归档格式(压缩归档必须 小于 256 MB)。

你可以从三种格式中选择:

完成!现在你知道如何在我们的文件管理器中管理文件了 😊

注意:

  • 确保你的文件和文件夹放在 public_html 文件夹内,因为它是你网站的根文件夹。这样你所有的网站内容都会正确显示 😊
  • 由于 public_html 是你的根文件夹,请不要删除它或任何其父文件夹,以确保网站稳定运行。
  • 删除文件是不可逆操作,因此如果你误删了文件,可以通过 备份恢复
  • 如果你想将网站文件从一个域名移动到另一个域名,请查看 此文章
  • 重命名文件时,请确保不要移除文件扩展名(例如 file.php 改为 file),否则可能导致文件不可用。
  • 解压文件时,如果你指定的文件夹不存在,它会被 自动创建
  • 在文件管理器中,你可以解压小于 256 MB 的归档;如果归档更大,可以通过 SSH 解压。
  • 此外,如果通过文件管理器压缩文件无效,或你想压缩更大的文件,可以通过 SSH 轻松完成。
  • 如何通过 FTP 上传备份?

来源:Hostinger 官方帮助文档